Now that the PolCal team has finished measuring detector polarization angles, it’s the Receiver Team’s job to take apart the camera, fix it up a little, and re-install it. There’s quite a bit of work involved, and the first step was taking the camera out of the telescope. Black Cat, the name we affectionately gave the black cryostat that contains the camera, is attached to a massive “optics” cryostat that keeps the ~ 1 meter secondary mirror of the telescope at a cool 10 K. The entire double-cryostat structure has to be lowered out of the telescope boom and back into the telescope control room so we can get to work on it.
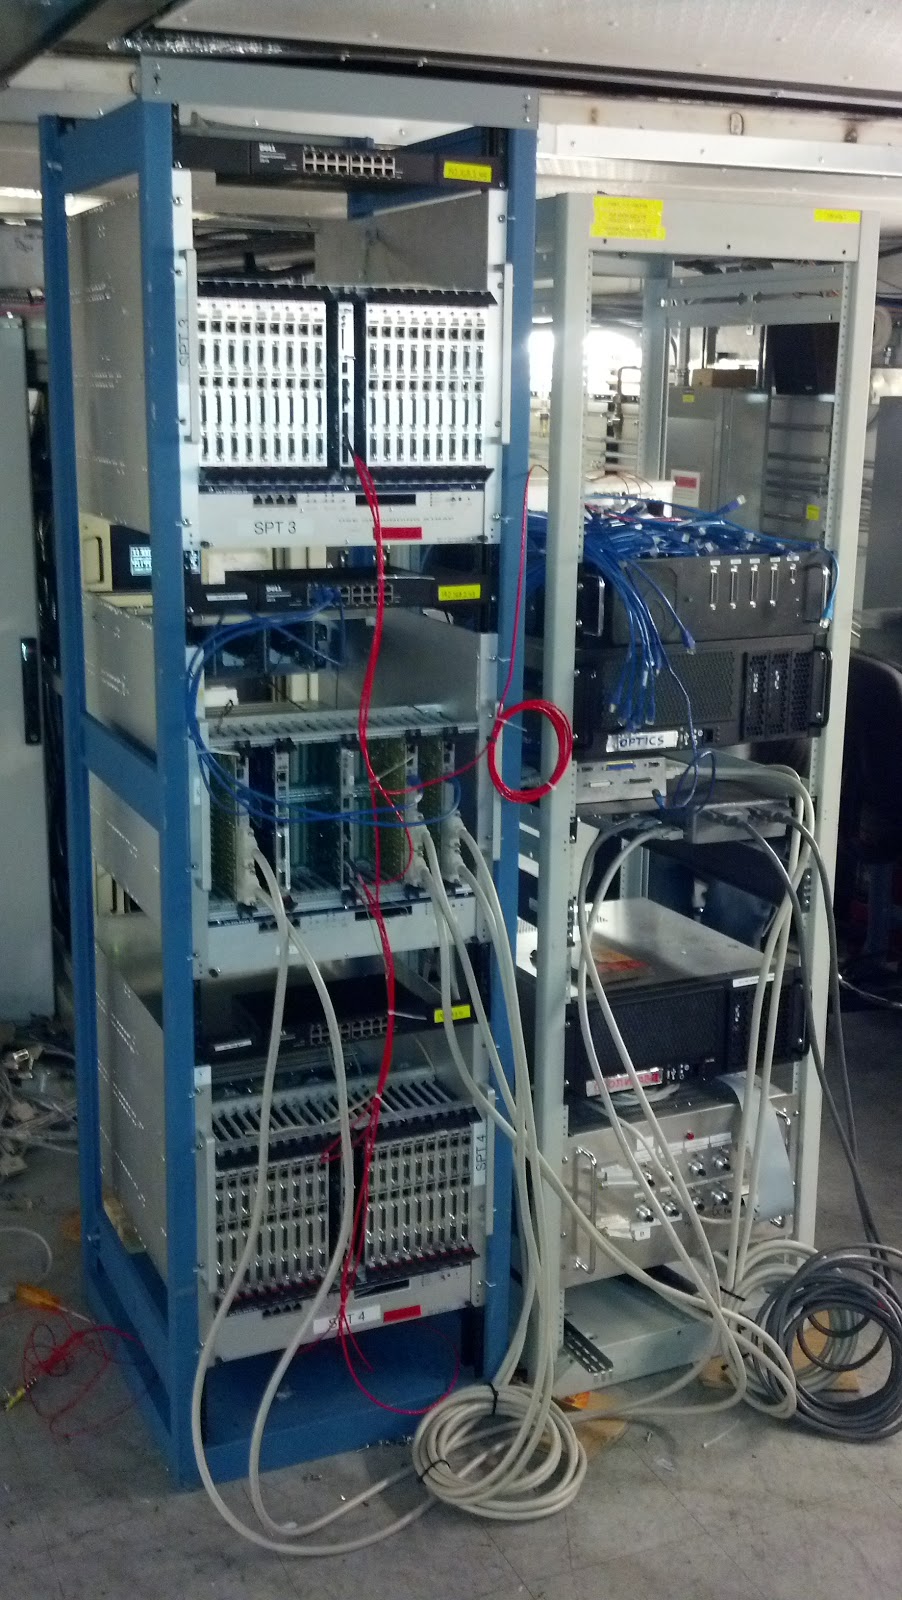
The first thing to do is to detach all of the readout cabling that took oh-so-long to plug in and secure at the end of the last deployment season. With the cabling out of the way we hook up some chain hoists to the giant cryostat, disconnect the helium refrigerator lines, unbolt the cryostat from the bench in which it sits in the telescope boom, and then slowly and carefully lower it down onto a rolling cart in the control room so we can move it out of the way.
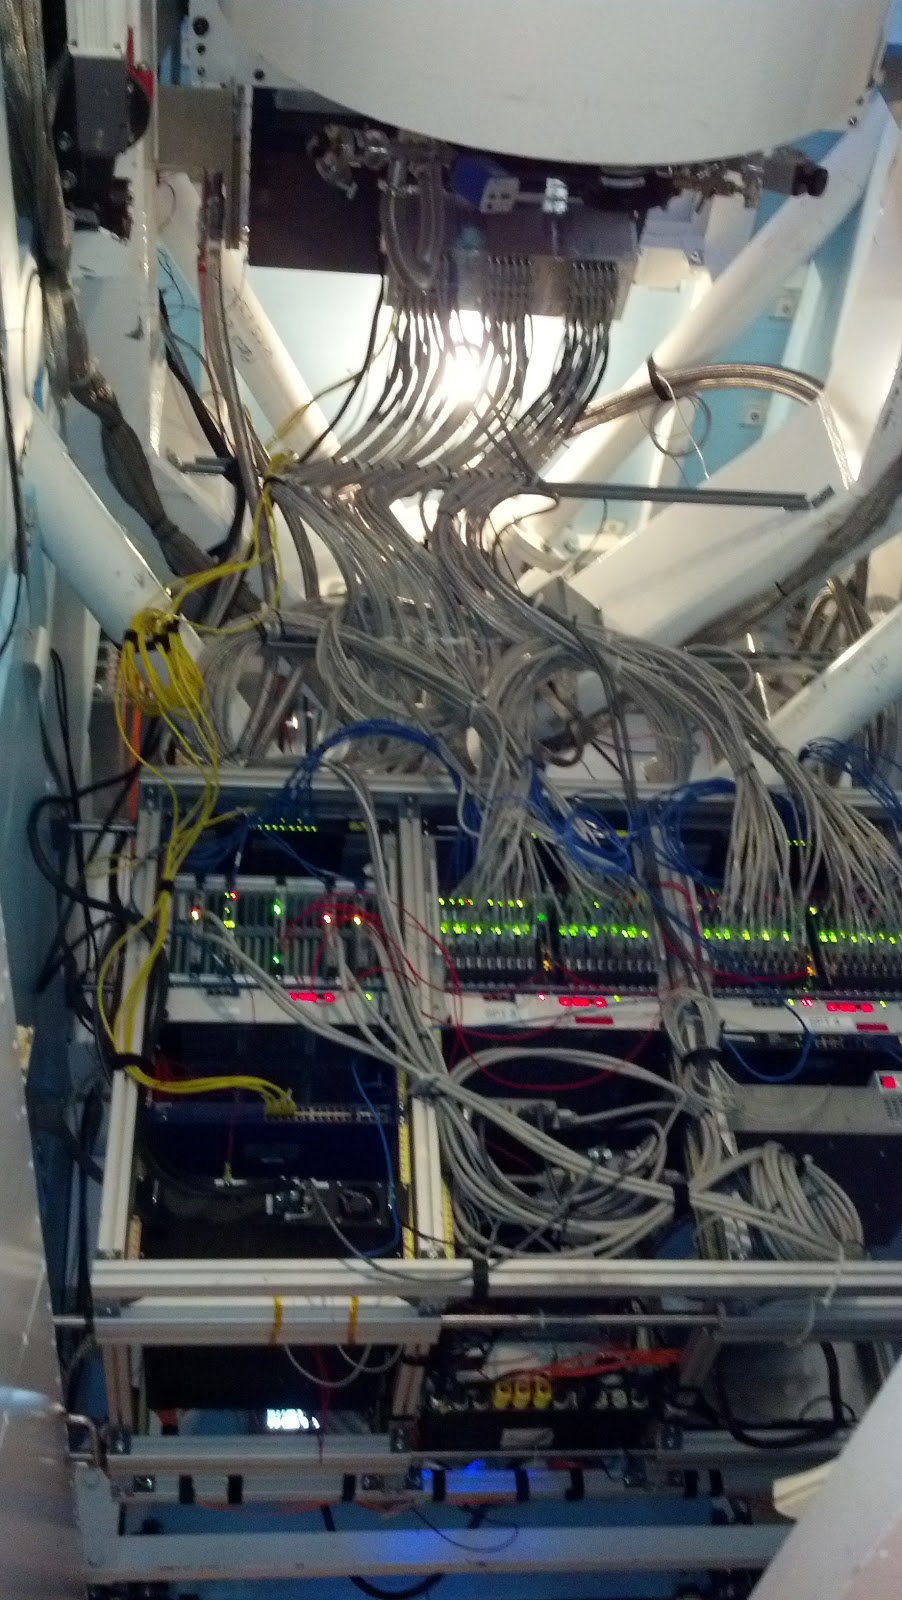
Black Cat still in the telescope boom and readout electronics plugged in. Time to disconnect all of those cables.
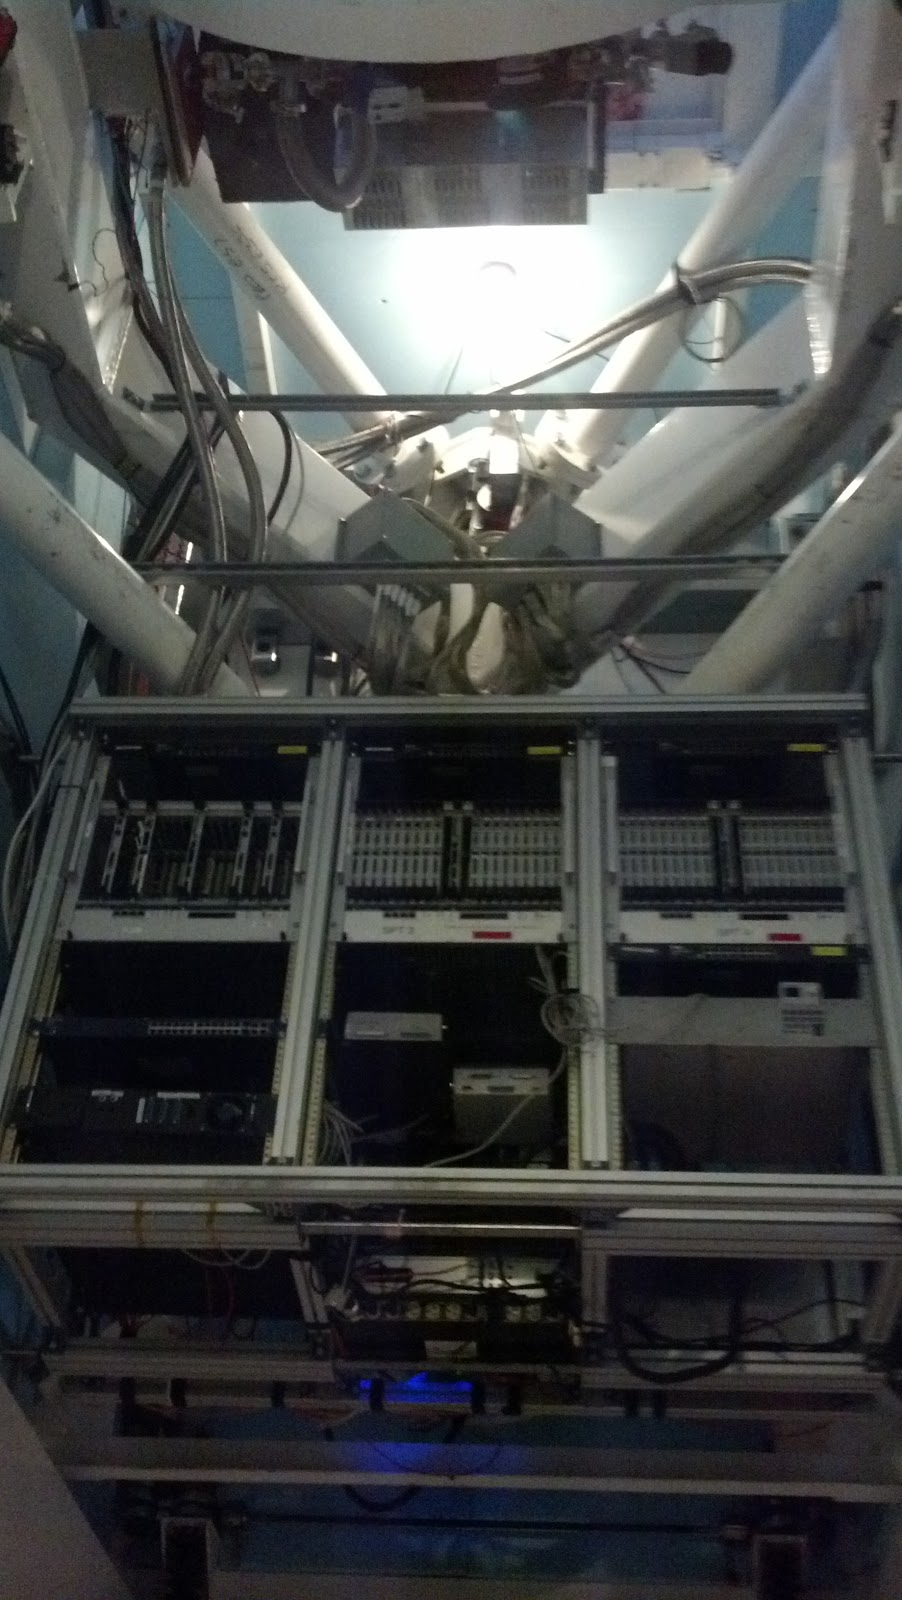
Ready to be dropped out of the telescope!
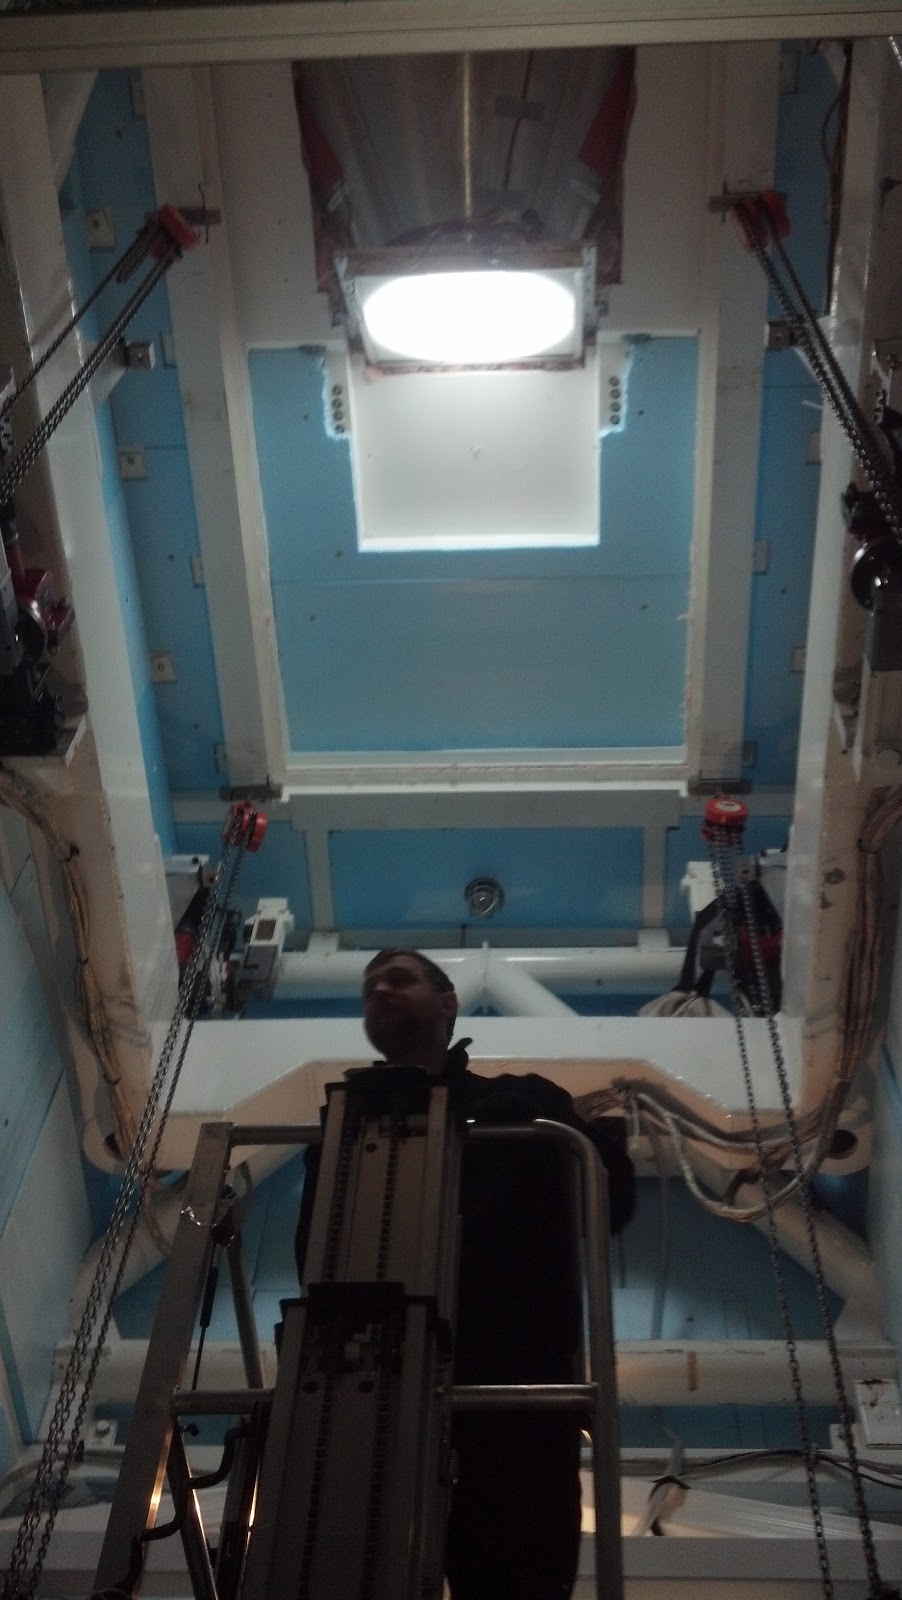
The cryostat is down! JT coming down the manlift after grabbing some tools.
All of those electronics have to come down too. The crates are really heavy so we use the manlift to help out.

Black cat on the ground and warming up.
The readout electronics set up in a rack on the ground so we can monitor the cryostat as it warms up.
The evening we dropped the cryostats into the control room we were walking back for dinner and a plane was landing, which meant we were stuck behind the crossing beacon (we have to walk across the end of the runway to get back to the station so naturally that’s dangerous when a plane is landing or taking off). We stopped at MAPO, a laboratory where another CMB polarization telescope is operating. During the winter a huge drift of snow lovingly called MAPO Mountain built clear up to the second floor of the building, leaving a sharp “cliff” edge facing the building. As we waited for the plane we climbed to the top of of the cliff and slid 20 feet or so on our stomachs down to the bottom. Lots of fun.
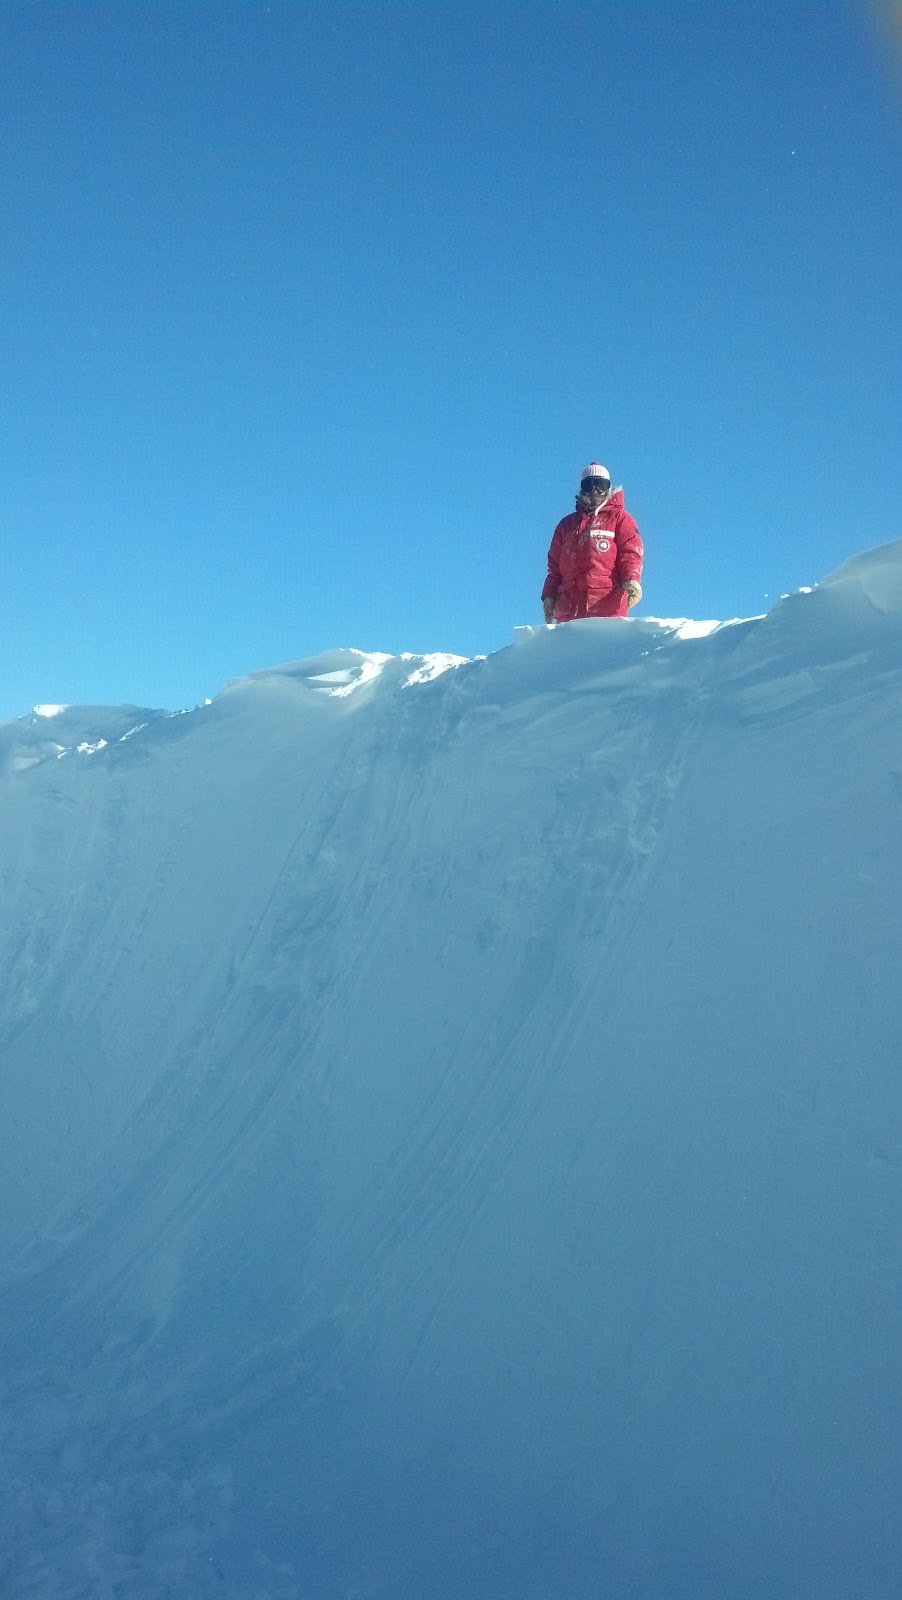
Another CMB scientist at the top of "MAPO Mountain." Sliding down this winter snowdrift was a lot of fun.
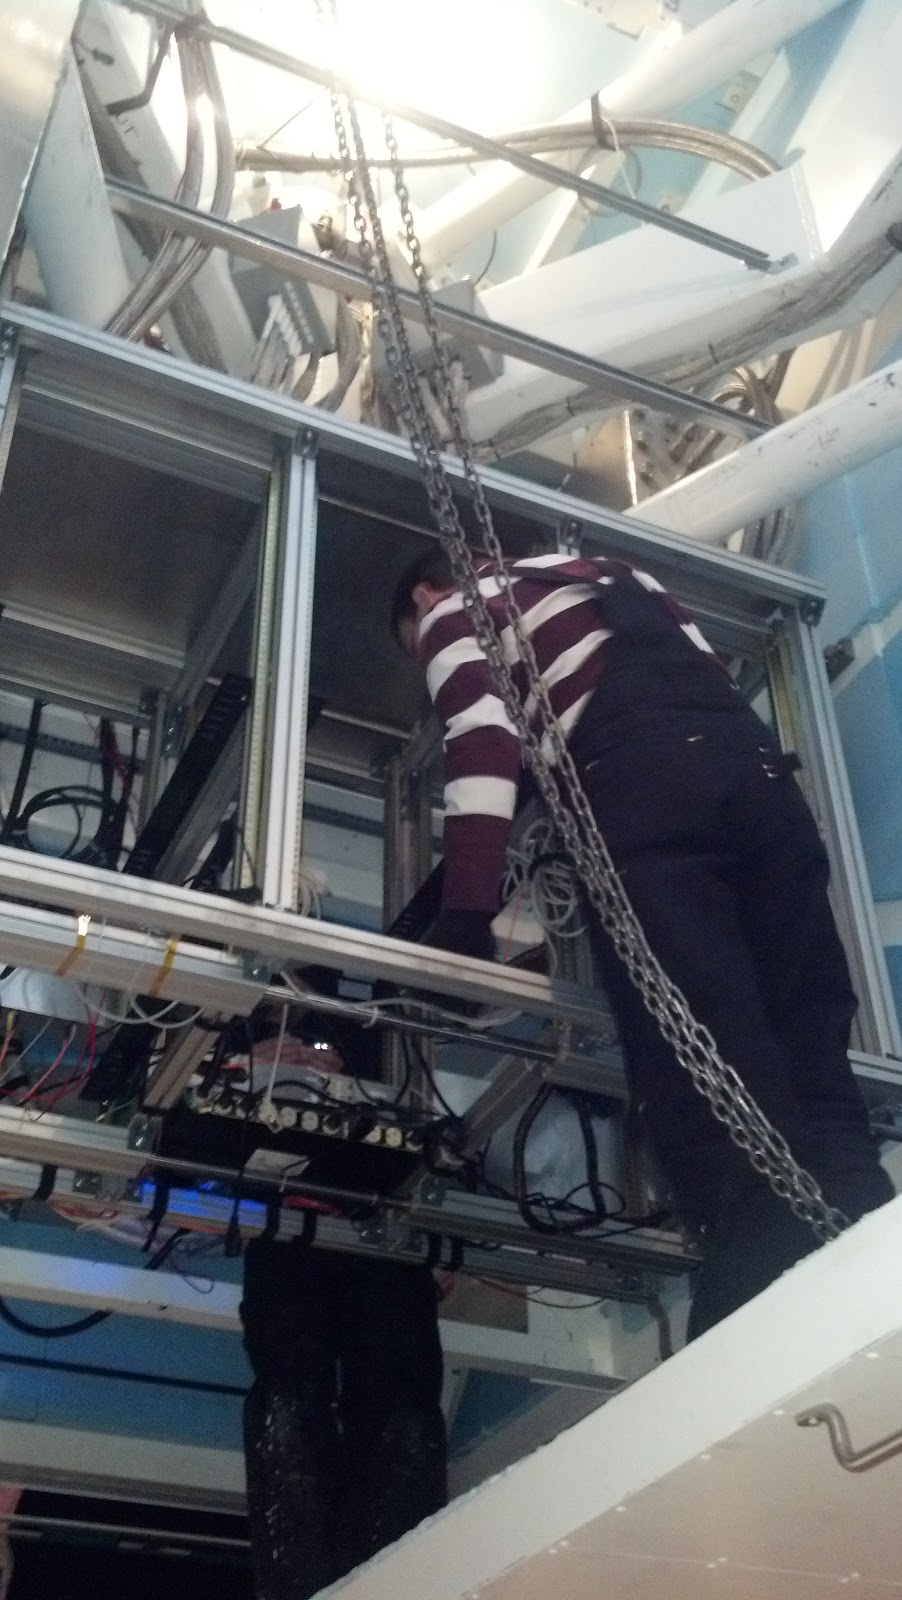
Anyway, back to work! With the cryostat on the ground we had to let it warm back up to room temperature and bring the pressure up to atmospheric (the cryostat holds a vacuum so air can’t conduct heat from the warmer portions of the cryostat to the cooler portions). This takes about a day and a half. By this past Friday we were ready to detach the camera cryostat from the optics cryostat. The two are held together by some screws and a couple quarter-inch alignment pins. It’s easiest to pull the cryostats apart when the pins are perpendicular to the ground, and this requires hoisting up the back side of the cryostat a few feet off the ground. This thing literally ways a ton and is about the size of a VW beetle so it’s an exciting procedure. Once everything is aligned, we literally pull the camera cryostat off and set it down on a cart of it’s own.
Now the fun really began. We took off the various radiation shields and exposed the SPTpol camera. This thing has been sitting at a fraction of a degree above absolute zero since mid-January and now it’s all cozy warm and open for us to look at, which is kind of fun to think about. The back of the camera is a complicated mess of readout cabling and heat sinking to get each part of the camera successively cooler. After an hour or so of inspection, cable and thermometry removing, and unscrewing we lifted the camera out of the cryostat and I carried it up the stairs to the clean room where we usually work on it.

A couple of days after starting to warm up, the cryostat is open and we start disconnecting all the readout cabling inside the camera.
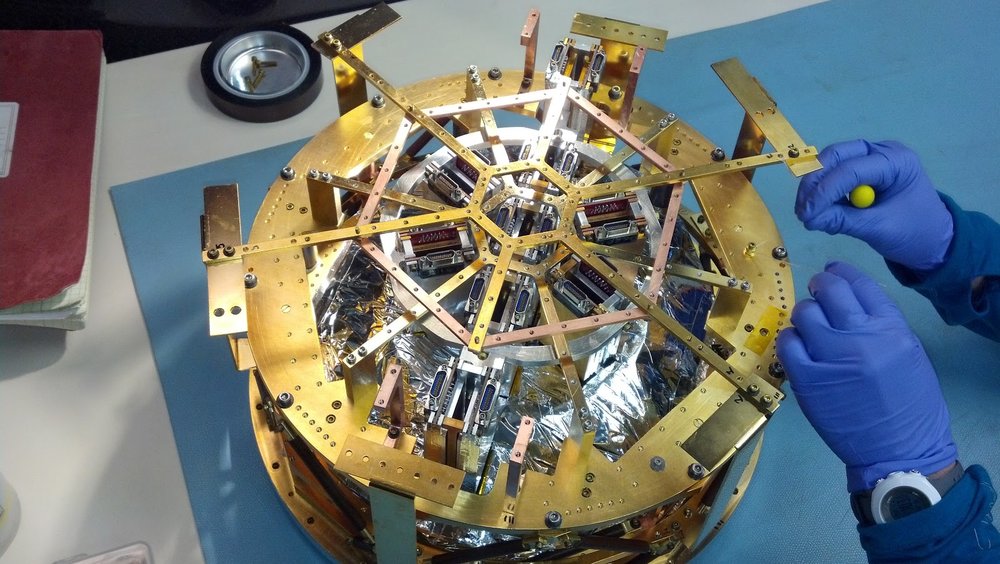
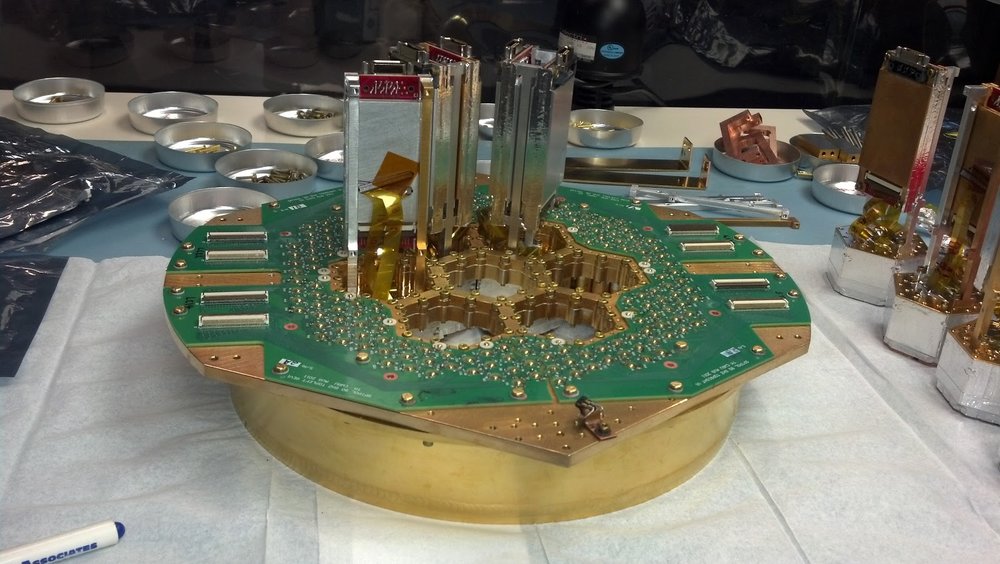
The SPTpol camera out of the cryostat and upstairs where Liz and I dismantled it. First we take off the spider web-like structure on the back side.
The rest of the day was spent methodically dismantling the camera to get to the detector modules at its heart, where we’ll be doing a lot of rework. One of the 150 GHz modules was acting funny this year and we want to replace it with a spare module. If you remember we had to install several structures to keep the back of the camera from shaking as the telescope moved and unfortunately we had to remove all of these anti-shaking structures to get to the module we wanted to replace. Not really difficult work, but it did mean tearing the camera completely apart. In just a few short hours the camera went from happily installed in Black Cat to being in a hundred pieces in the upstairs clean room. It’s a little crazy to think that we have this big complicated machine and there’s no instruction manual besides our notes and pictures to refer to when pulling it apart and putting it back together. A little scary, especially when we want to make sure it works better than last time. But we designed it and assembled it (multiple times now) so we know exactly how it works and exactly what to do. Just another day at the office!...
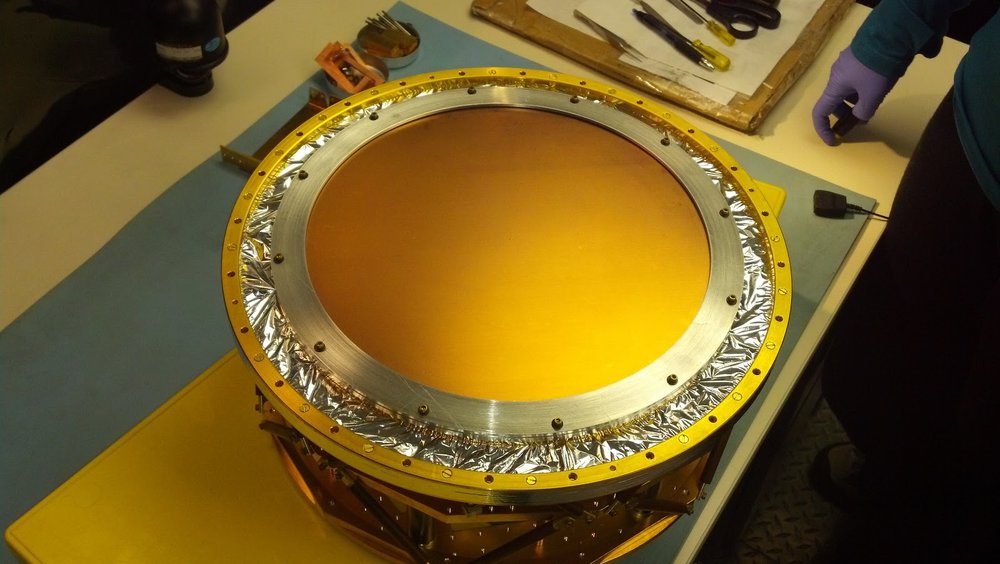
The camera flipped over to the side that accepts light. We first have to take this filter off.
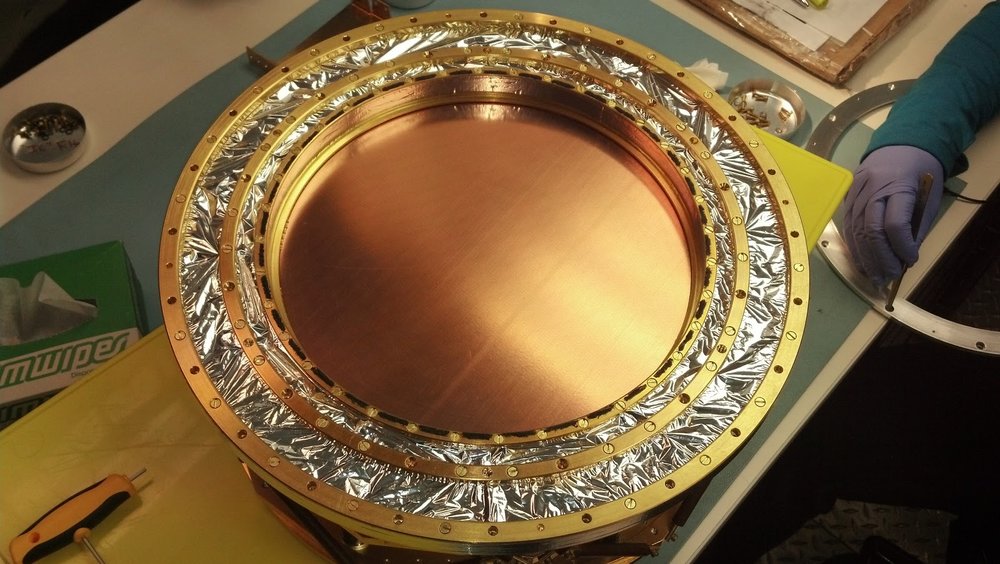
Next we remove the aluminized mylar blanket that shields the back side of the camera from nasty radio frequency interference.
All that's left on the front are a few more filters that define what colors of light the camera accepts.
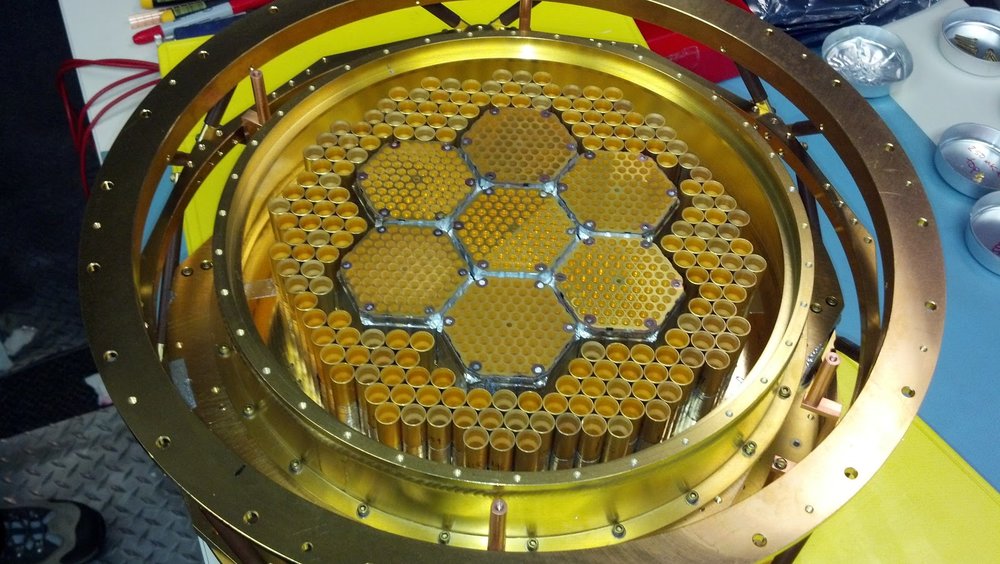
With the filters off you can finally see the feedhorns. The seven 150 GHz modules are in the center. Surrounding them are 180 individual 90 GHz feedhorns.
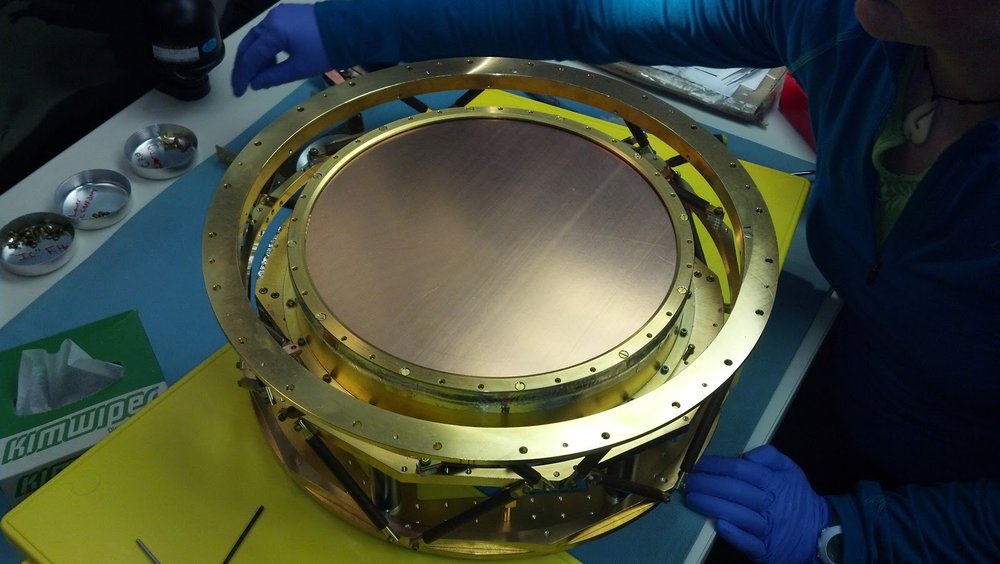
Flipping the camera back over we take off the "wedding cake" support structure surrounding it and can start removing the aluminum anti-shaking supports.
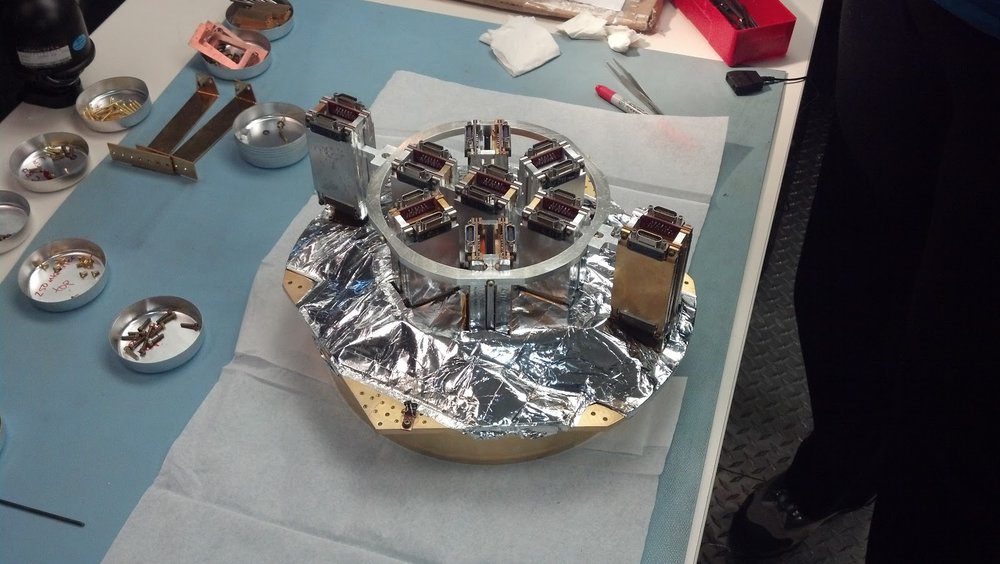
The focal plane almost totally dismantled. We wanted to do work on two of the central modules, but it meant tearing out two more to get to them.